Sunday Inspiration: Charlotte Tilbury and Liberty Ross
/My new, virtual BFF - Charlotte Tilbury
This video was recently featured on Charlotte Tilbury's Youtube channel and ultimately served as my source of inspiration. To uncomplicate matters, I chose a few items from my own stash and performed a dry run yesterday and I'm actually quite pleased with the execution.

My take
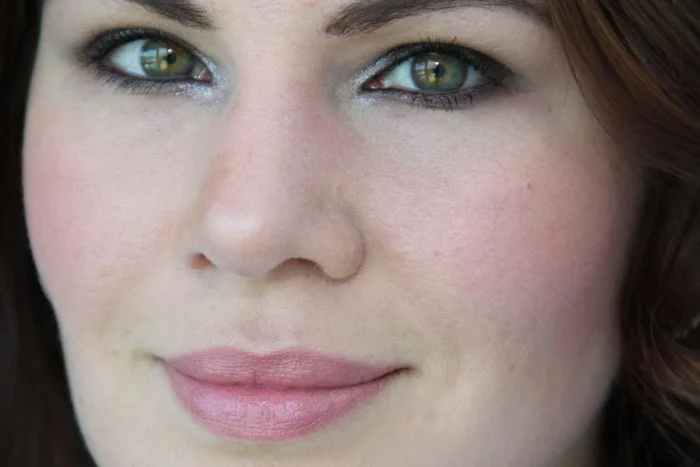
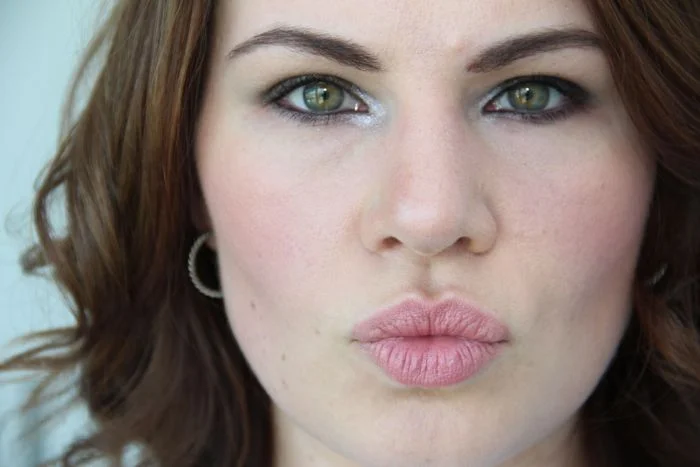
Typically I shy away from using such dark colours on my eyes in fear of looking like a raccoon or a panda bear; the real-estate is minimal, but I soldiered on to see if I could make this work. To temper the intensity of the eyes, I kept things fairly neutral -- clean, sun kissed skin and full soft pink lips, all of which had to be framed with bold brows.
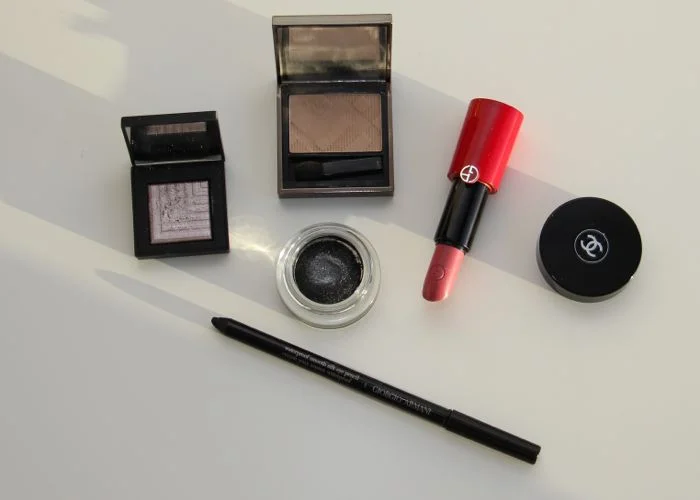
A handful of the items used: NARS Callisto, Burberry's Trench, Chanel's Mirifique, Armanis' Rouge Ecstasy in Daybreak and Waterproof Smooth Silk Eye Pencil in Black
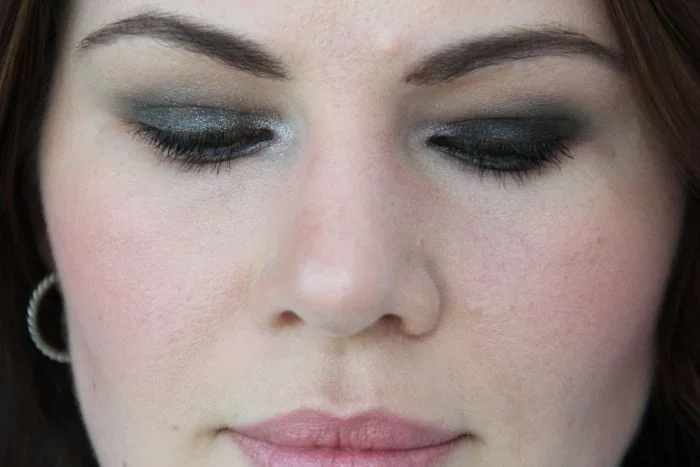
The eyes
I took a bit of a backwards approach and started with the eyes first as I knew there would be loads of fallout. The juxtaposition of the completed eye look and my ruddy, red skin was a bit shocking, albeit temporary. Do me a favour and don't let the strong eyes deter you, I almost threw in the towel due to fear and uncertainty.
Eye Breakdown
- Apply an eye primer and allow it to set;
- Curl your lashes;
- Tight line the upper lash line with black eyeliner;
- Grab a neutral beige eyeshadow, preferably without shimmer and blend it from the upper lash line to your brow bone;
- Next, reach for a sparkly black eyeshadow. If you don't own one, simply layer a wicked shimmery shadow over something similar to MAC's Carbon. Keep the darkness limited to the eyelid only; should you accidentally go past the imaginary line blend it out as if your life depended on it;
- Line the lower lash line with the same black eyeliner you used a few moments before and smudge it with the excess black eyeshadow applied in the previous step to make the lashes appear thicker;
- Highlight the inner corners of your eyes with a silvery pink eyeshadow to make your eyes pop;
- Apply lots and lots of mascara. We're talking truckloads;
- Fill in those brows and be sure to go a tad darker than usual;
- Finally, grab a cotton bud or Q-tip soaked in eye makeup remover and clean up any fallout.
Skin, lips and cheeks
Underpin your everyday makeup with a primer and medium coverage foundation; I used a pearl sized amount of Laura Mercier's Silk Cream Foundation to cancel out the redness in my cheeks, nose and forehead.
Skin Breakdown
- Apply primer, making sure to focus on any oily areas;
- If you have any blemishes or dark undereye circles, use concealer to erase these bad boys;
- Reach for that medium coverage foundation and blend all over, making sure to avoid messing up those beautiful peepers;
- Set the foundation with finishing powder or powder foundation;
- Contour the hollows of the cheeks, along the sides of the nose and the top of your forehead right near the hairline;
- Highlight the bridge of your nose, the cheekbones, the brow bone, the centre of your forehead and the cupids bow;
- Smile and apply a small amount of blush and blend upward towards the temples;
- Finish with lipstick.
A word of caution, I did experience fallout from my water eyes. Be sure to tote around a cotton bud or two.
Full list of items used:
- Laura Mercier's Foundation Primer
- Laura Mercier's Silk Creme Foundation in Cream Ivory
- Chanel's Vitalumière Loose Powder Foundation in shade 30
- Too Faced Chocolate Soleil Medium/Deep Matte Bronzer
- Hourglass' Ambient Lighting Powder in Luminous Light
- Illamasqua's Blush in Naked Rose
- NARS Smudge Proof Eyeshadow Base
- NARS Dual Intensity Eyeshadow in Callisto
- Chanel's Illusion d'Ombre in Mirifique
- Burberry's eyeshadow in Trench
- Armani's Waterproof Smooth Silk Eyeliner in Black
- Chanel's Inimitable Waterproof Mascara in Noir
- Armani's Rouge Ecstasy in Daybreak
//Video Source